My goodness, this year's flying past. we are almost at the end of March already - a quarter of the way to Christmas!
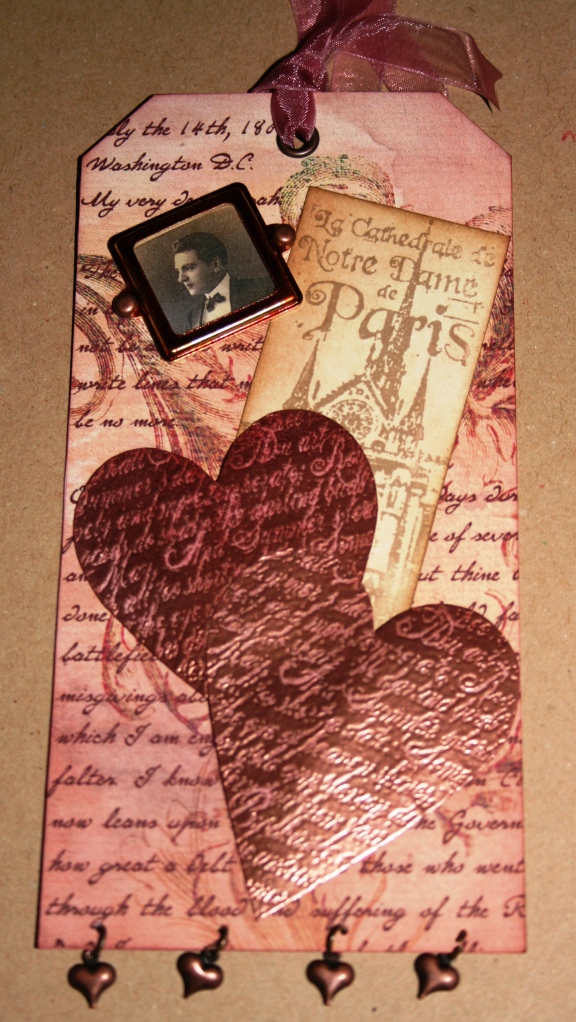
This month's tag technique was faux leather. The suggested methods were either to use torn up masking tape or to spray with glycerine and crumple. In all honesty, I don't care much for the masking tape idea and I'd never tried glycerine before, so that's the technique I chose.
Firstly, dilute the glycerine to a concentration of 2 parts glycerine to 5 of water in a spray bottle.
Spray both sides of some 300gsm paper, rubbing in well and crumpling the paper to help the glycerine absorb into the paper.
Leave to dry and repeat until the paper is soft and pliable.
Mine looked and felt like suede.
I then inked an embossing folder, put a piece of paper in and ran through the cuttlebug to emboss and ink at the same time. It still felt like suede but with a lovely retro design.
At this point you can spray with sparkle and shine and buff to resemble polished leather but I chose to leave mine unpolished.
I mounted a large piece on the tag and then made some in other colours, using the other side of the embossing folder to get a smaller motif which I cut out individually.
I pierced and stuck the shapes together with glue and a brad to get the retro flower which I stuck on with glue gel.
I had to submit 2 tags so did two different colour ways - I thin k the blue one is my favourite.
A great technique which I loved and will definitely do again.
Gina
Saturday, 29 March 2014
Friday, 14 March 2014
February Technique Tags - Distressing
I have to say I don't normally 'do' distressing to the extent I did on these tags, but I was pleasantly surprised - even though the PVA technique didn't work brilliantly for me. This first tag was done using vaseline to create a resist, painting over with acrylic, allowing to dry and then removing a layer of paint by rubbing off the paint and vaseline together.
I was trying for an effect of an old metal tray that had been painted over several times and got damaged over time. I gilded part of the tag and then painted a base coat of acrylic over part of the tag.
When it was dry, I smeared over lip balm - it was the nearest thing I had to vaseline - and painted over with a second colour.
I let that dry and repeated the process, finishing with an off white top coat.
Next, I overstamped with a morning glory stamp from Flora and Fauna by Chocolate Baroque and coloured in using promarkers.

My next attempt was using the PVA technique. Here you paint on a base coat of acrylic paint and allow it to dry, followed by a layer of diluted PVA. When dry, overpaint with the second colour of acrylic paint, allow to dry for a little while and then heat with a heat gun. The PVA blisters and cracks to look like old paint.
Mine blistered and cracked a little, but I liked the effect so carried on. This time I stamped with the pelargonium stamp from Flora and Fauna, again colouring with promarkers and a gel pan.
I think it turned out OK. This one looks like old paint is in the process of being scraped of a metal plate.
March's technique is faux leather - another technique I've not tried - think that one's going to get messy.
Gina
I was trying for an effect of an old metal tray that had been painted over several times and got damaged over time. I gilded part of the tag and then painted a base coat of acrylic over part of the tag.
When it was dry, I smeared over lip balm - it was the nearest thing I had to vaseline - and painted over with a second colour.
I let that dry and repeated the process, finishing with an off white top coat.
Next, I overstamped with a morning glory stamp from Flora and Fauna by Chocolate Baroque and coloured in using promarkers.
My next attempt was using the PVA technique. Here you paint on a base coat of acrylic paint and allow it to dry, followed by a layer of diluted PVA. When dry, overpaint with the second colour of acrylic paint, allow to dry for a little while and then heat with a heat gun. The PVA blisters and cracks to look like old paint.
Mine blistered and cracked a little, but I liked the effect so carried on. This time I stamped with the pelargonium stamp from Flora and Fauna, again colouring with promarkers and a gel pan.
I think it turned out OK. This one looks like old paint is in the process of being scraped of a metal plate.
March's technique is faux leather - another technique I've not tried - think that one's going to get messy.
Gina
Sunday, 19 January 2014
Technique Tags - January
As last year was so busy with the new job, I had little time for crafting - except for invites and so on for my son's wedding - so I've joined the Chocolate Baroque Technique Tag swap. The idea is that every month, we make two tags which employ a different technique, using products from Chocolate Baroque online store, send them off and then receive two done by another crafter in return. I did the alpha tags the year before last and there really is nothing like a deadline to get you crafting.
This month, the technique is to use a resist - either versamark on gloss card or a clear embossed resist.
This one uses white supersmooth card and the border is the part that uses the resist technique.
I stamped the border in versamark using Lace Fragments, embossed with clear EP and then coloured the paper with ink from a 'Peacock' distress ink pad. This is a great colour and a real pity that it was one of the seasonal editions because its not so easy to get hold of.
I thought it was fitting to use one of the stamps from Peacock fan stamp sheet. I've got three co-ordinating sets that came as a multibuy. There are new sets available now, but there are other gorgeous stamps I need before I get them.
The stamp is heat embossed in gold and coloured with promarkers in different shades of aqua.
My second tag is the same design, but stamped onto parchment paper for a different effect. This time, I have used Wild Honey for the border and around the edges.
I enjoyed making this and particularly like the colours on the white card, so I've done another one for myself.
February's tag is 'distress' and I've already made them but I'll blog those in February.
Gina
This month, the technique is to use a resist - either versamark on gloss card or a clear embossed resist.
This one uses white supersmooth card and the border is the part that uses the resist technique.
I stamped the border in versamark using Lace Fragments, embossed with clear EP and then coloured the paper with ink from a 'Peacock' distress ink pad. This is a great colour and a real pity that it was one of the seasonal editions because its not so easy to get hold of.
I thought it was fitting to use one of the stamps from Peacock fan stamp sheet. I've got three co-ordinating sets that came as a multibuy. There are new sets available now, but there are other gorgeous stamps I need before I get them.
The stamp is heat embossed in gold and coloured with promarkers in different shades of aqua.
My second tag is the same design, but stamped onto parchment paper for a different effect. This time, I have used Wild Honey for the border and around the edges.
I enjoyed making this and particularly like the colours on the white card, so I've done another one for myself.
February's tag is 'distress' and I've already made them but I'll blog those in February.
Gina
Tuesday, 14 January 2014
New Beginnings
I've decided to try to reawaken my craft blogs and where better to start than my first card of 2014.
I'm entering this for challenge 1 at creative challenges 2 where the theme is 'new'. I cut the rocker card base out on my new silhoutte cameo and it is for my new daughter-in-law's birthday.
This is one of my favourite Tilda images - very sweet, easy to colour and works for lots of occassions.
Hopefully I'll manage to post more in the coming year now the new job is no longer new and I can manage to find some crafting time at last.
Gina
Monday, 8 October 2012
Alpha Tag update
I've been a bad blogger. I haven't posted anything for such a long time. I have been particularly uninspired just lately, in fact the only thing I have really made is my alpha tags for the Chocolate Baroque Tag swap. You can tell how long it has been, the last tag I blogged was I is for insect and here we are in October and I've just sent off S and T and there are only 6 tags left to make.
So, to get up to date, here are J,K,L,M,N,O,P,Q,R,S & T all at once!
J is for Jute K is for Kite L is for Lace
Following on with
M is for Magnetic N is for Nature O is for Ornate

Next up we have
P is for Peacock Q is for Question R is for Romance
and, last but not least are
S is for Sewing T is for Tree
Gina x
So, to get up to date, here are J,K,L,M,N,O,P,Q,R,S & T all at once!
J is for Jute K is for Kite L is for Lace
Following on with
M is for Magnetic N is for Nature O is for Ornate

Next up we have
P is for Peacock Q is for Question R is for Romance
and, last but not least are
S is for Sewing T is for Tree
So, there we are, all up to date now. Just the last 6 letters of the alphabet to do. Its been a long project, but definitely worth it to get such a wide variety of work from so many people.
Gina x
Wednesday, 30 May 2012
A book card
After thinking about it for an age, I finally got around to making my first book card this week. My friends had made one at a Saturday class that I hadn't been able to go to and I had seen one by Debbie Dolphin in Craft Stamper. Neither seemed the right size for what I had in mind, so I made up my own measurements as I went along and ended up with this...
This is the front view, its about the size of a paperback but a bit deeper.
I went overboard with the spellbinders 'Bitty Blossoms' on the front, but I kind of like the effect.
I stamped the peach pearlescent card first with one of the Big Blossoms stamps from Chocolate Baroque. I have a feeling this one has been discontinued, but the new 'Sunny Sunflowers' would do the same thing. The lines of the petals have put an attractive design onto the petals of the flowers.
The next view is of the inside...
Again, its a bit OTT on the decorative front but who cares! I love the design paper - its by KaiserCraft - I've bought a whole lot of the new designs as they are gorgeous and I'm a paper addict anyway. These flowers were from Wild Orchid Crafts who have a brilliant range of flowers and other embellishments.
On the whole, I'm fairly happy with how it turned out for a first attempt and I liked the size and proportion.
If you want a go, here are the instructions:
The book cover is from a piece of 12 x 12 pearlescent but all measurements are in cm
Attach the mats front, back and on the spine - inside and out
Attach the design papers front, back and on the spine - inside and out. The smaller design paper goes behind where the 'pages' fit.
Make the pages by scoring every half an inch using a Hougie board along the short width of the card. Fold in a concertina, making sure to keep the folds square and properly aligned. Do this to all 4 of the card pieces.
Interlock the 'pages' and glue top and bottom to hold them in place.
Now its matter of choice - I stuck the pages in place and then decorated inside. Some people prefer to do the decoration and then stick the pages on afterwards - its up to you.
Cut some decorative strips with a decorative punch or spellbinder and attach them to the front of the pages as shown.
Die cut some corners or use purchased metal corners for decoration.
Decorate front and insides as you like with a scene or sentiment. These are computer generated and die cut.
I have another one in mind, but it will be next week before I manage to make it.
Gina x
This is the front view, its about the size of a paperback but a bit deeper.
I went overboard with the spellbinders 'Bitty Blossoms' on the front, but I kind of like the effect.
I stamped the peach pearlescent card first with one of the Big Blossoms stamps from Chocolate Baroque. I have a feeling this one has been discontinued, but the new 'Sunny Sunflowers' would do the same thing. The lines of the petals have put an attractive design onto the petals of the flowers.
The next view is of the inside...
Again, its a bit OTT on the decorative front but who cares! I love the design paper - its by KaiserCraft - I've bought a whole lot of the new designs as they are gorgeous and I'm a paper addict anyway. These flowers were from Wild Orchid Crafts who have a brilliant range of flowers and other embellishments.
On the whole, I'm fairly happy with how it turned out for a first attempt and I liked the size and proportion.
If you want a go, here are the instructions:
The book cover is from a piece of 12 x 12 pearlescent but all measurements are in cm
- cover - 1 of 30.5 x 16
- mats - 4 of 15.4 x 12.9 and 2 x 15.4 x 3
- design paper - 3 of 14.9 x 12.4, 2 of 14.9 x 2.6 and 1 of 12 x 9.5
- pages - 2 of 25.5 x 14.7 and 2 of 25.5 x 12.2
Attach the mats front, back and on the spine - inside and out
Attach the design papers front, back and on the spine - inside and out. The smaller design paper goes behind where the 'pages' fit.
Make the pages by scoring every half an inch using a Hougie board along the short width of the card. Fold in a concertina, making sure to keep the folds square and properly aligned. Do this to all 4 of the card pieces.
Interlock the 'pages' and glue top and bottom to hold them in place.
Now its matter of choice - I stuck the pages in place and then decorated inside. Some people prefer to do the decoration and then stick the pages on afterwards - its up to you.
Cut some decorative strips with a decorative punch or spellbinder and attach them to the front of the pages as shown.
Die cut some corners or use purchased metal corners for decoration.
Decorate front and insides as you like with a scene or sentiment. These are computer generated and die cut.
I have another one in mind, but it will be next week before I manage to make it.
Gina x
Monday, 30 April 2012
Keeping Busy
Although its very busy at the moment, I've managed to make time to make a couple of cards. The first is a birthday card for a friend from card club.
Its an easel card made using the Honey Bee themeplate by Chocolate Baroque.
The images are all coloured using pro markers and the honeycomb on the bottom is gold embossed and then coloured.
The flowers and bee wings have added glitter - a necessity!!
I've use a little circular sentiment from craft works. I was quite pleased with this one and the stamps are truly gorgeous.
My next card is a real departure from anything I've done before. It is for a colleague's wedding.
Its quite large - 18 x 24cm as it has to be signed by all of the department.
Its worked out quite well - the bow is well over the top - but I kind of like how it looks.
The paper was purchased pre embossed as the size is just too big for my little cuttlebug... Do I really need the grand calibur?
I'm currently working on another card using the bee stamps which has to be finished in the next couple of days, so I'll post that at the weekend.
Gina x
Its an easel card made using the Honey Bee themeplate by Chocolate Baroque.
The images are all coloured using pro markers and the honeycomb on the bottom is gold embossed and then coloured.
The flowers and bee wings have added glitter - a necessity!!
I've use a little circular sentiment from craft works. I was quite pleased with this one and the stamps are truly gorgeous.
My next card is a real departure from anything I've done before. It is for a colleague's wedding.
Its quite large - 18 x 24cm as it has to be signed by all of the department.
Its worked out quite well - the bow is well over the top - but I kind of like how it looks.
The paper was purchased pre embossed as the size is just too big for my little cuttlebug... Do I really need the grand calibur?
I'm currently working on another card using the bee stamps which has to be finished in the next couple of days, so I'll post that at the weekend.
Gina x
Tuesday, 24 April 2012
Alpha Tag Swap
I can't believe how fast the time is flying by. Late last year, I signed up for the Chocolate Baroque Guild Alphabet Tag Swap.
The idea is that over the course of the year, we make 2 or 3 tags per month and swap them between members of the guild. By the end of the year, we should have 26 tags made by other members, showcasing a variety of techniques and Chocolate Baroque products.
So far, we have completed 9 tags and have reached as far as I in the alphabet.
I've been intending to blog my tags for some time, but have only now got around to it. So here are my first 9 tags.
January's letters were A and B, I choose the lovely Crafty Individuals stamps and vintage fringing to make my 'A is for Abbey' tag. The 'B is for Butterflies' features a classic Chocolate Baroque stamp and a selection of die cuts by Marianne, Tim Holtz and Crealies.
February brought with it C and D. Again, Crafty Individuals and Chocolate Baroque were my stamps of choice in 'C is for Chic' and 'D is for Darling'. Both February tags had a vintage feel.
The idea is that over the course of the year, we make 2 or 3 tags per month and swap them between members of the guild. By the end of the year, we should have 26 tags made by other members, showcasing a variety of techniques and Chocolate Baroque products.
So far, we have completed 9 tags and have reached as far as I in the alphabet.
I've been intending to blog my tags for some time, but have only now got around to it. So here are my first 9 tags.
February brought with it C and D. Again, Crafty Individuals and Chocolate Baroque were my stamps of choice in 'C is for Chic' and 'D is for Darling'. Both February tags had a vintage feel.
March was a challenge to get three tags completed in a month when I was really busy with work. I managed it but must have been one of the last to submit my tags.
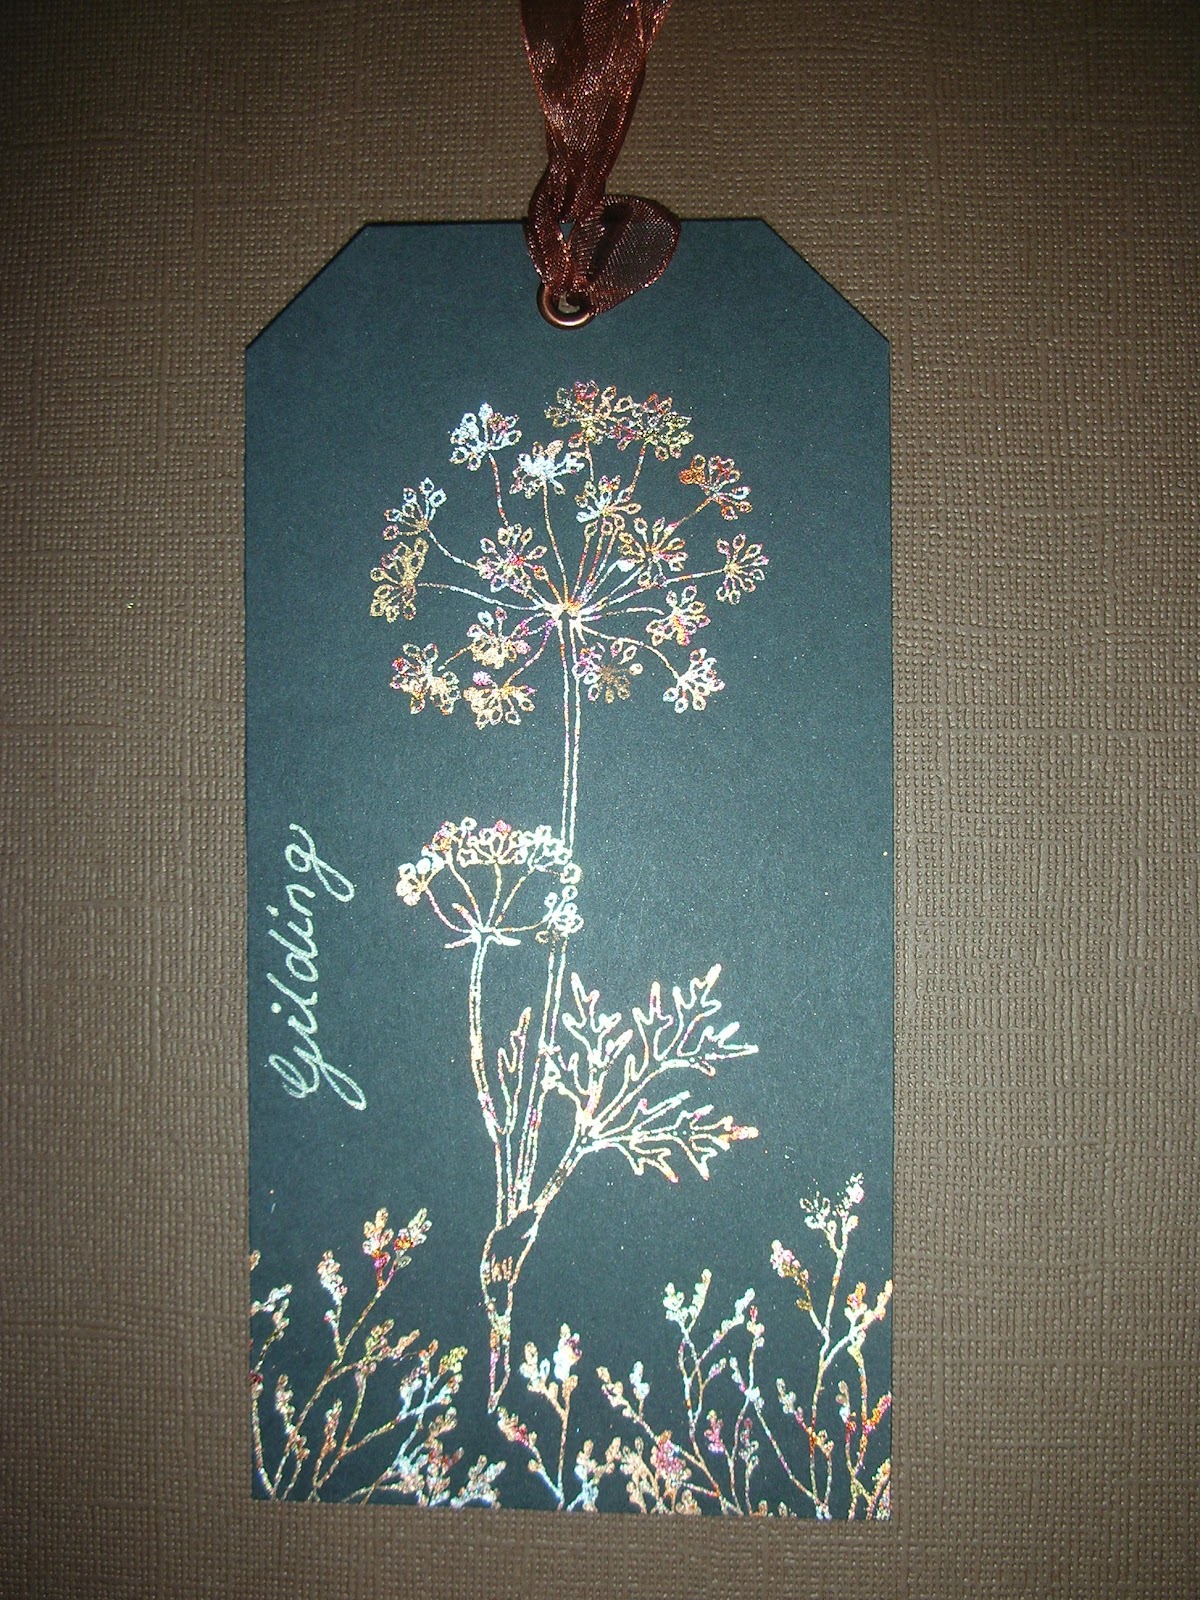
I chose Chocolate Baroque stamps for all of my projects this month. 'E is for Elegant' uses 'Belle' 'F is for Fan' uses repeated stamping and embossing of the fan element from 'Peacock Fan' and I used stamps from 'Wild Meadow' to complete 'G is for gilding'.
If I thought March was tough to meet the deadline, then April was something else. Madness at work, Easter holidays, multiple family birthdays and occasions as well as a week away in the sun meant I was really up to the wire on this one. My H and I tags were completed with just a few days to spare. They arrived at their destination on Saturday 21st April for a deadline of 23rd April. Eek.
Again, classic Chocolate Baroque stamps were used in my 'H is for Hidden' and 'I is for Insects'.
I have to say though, that the new TH Tattered Floral Garland Die is delightful and sure to be a firm favourite in the future.
I really am loving this swap and its great waiting for the postman to arrive each month to see what surprise tags I'm sent. It isn't too late to join in, though you won't end up with a full alphabet now. If you are interested, go on over to Chocolate Baroque , join the guild and join in.
Bye for now,
Gina x
Sunday, 25 March 2012
Ruby Wedding... another one
It seems its the time for Ruby Weddings. This time it is my sister who has been married for 40 years. No stamping on this one, just die cutting and dry embossing.
I've had this gorgeous paper in my stash for ages and I'm pretty sure its a 'Making Memories' one. Its distressed with aged mahogany and faux stitched.
The beautiful ruby red metallic card was found at the NEC last year. I embossed it with one of the new Spellbinders M-bossibilities. It looks fab IRL.
The heart is all of the dies from the Nellie Snellen heart die pack layered up and the sentiment is computer generated, die cut with Spellbinders.
A ribbon, a little double bow and some gems tie it all together.
Hopefully things will start to quieten down at work soon and I can get to do some more crafting (and blogging).
Everything seems so last minute at the moment.
Gina x
I've had this gorgeous paper in my stash for ages and I'm pretty sure its a 'Making Memories' one. Its distressed with aged mahogany and faux stitched.
The beautiful ruby red metallic card was found at the NEC last year. I embossed it with one of the new Spellbinders M-bossibilities. It looks fab IRL.
The heart is all of the dies from the Nellie Snellen heart die pack layered up and the sentiment is computer generated, die cut with Spellbinders.
A ribbon, a little double bow and some gems tie it all together.
Hopefully things will start to quieten down at work soon and I can get to do some more crafting (and blogging).
Everything seems so last minute at the moment.
Gina x
Tuesday, 14 February 2012
Mountainside
No crafting at all at the moment as I'm in New Hampshire for a week's skiing. The weather hasn't been great, with really high winds blowing the snow off the mountain and temperatures as low as -13Celcius. To say its all man-made snow though, its pretty good and we are having a great time.
Gina x
Gina x
Friday, 27 January 2012
National Flag Colours
Phew, only just going to make it for this week's MDUC challenge to use your country's national flag colours.
Here is my entry, using Tilda with heart balloons from this season's sweet crazy love collection.
Better post quickly as links close in 8 minutes!!
Hugs, Gina x
Here is my entry, using Tilda with heart balloons from this season's sweet crazy love collection.
Better post quickly as links close in 8 minutes!!
Hugs, Gina x
Wednesday, 25 January 2012
Pretty Birdcage
I've finally got round to using one of the stamps from the Pretty Birdcage stamp set from Chocolate Baroque. Its a gorgeous set and I bought it almost as soon as it was released, together with the lovely Honey Bee set. Life has been so busy that I've only just managed to use it, and that was in a very quick make.
One of the ladies at card class has unfortunately had a minor stroke and I wanted to get a card made fairly quickly. This stamp is beautiful and doesn't need much in the way of embellishment so it was ideal. Its coloured with pro-markers and the bird glazed with crystal laquer.
I do hope she recovers quickly, so get well soon Pat, we really are thinking of you.
Hugs, Gina x
One of the ladies at card class has unfortunately had a minor stroke and I wanted to get a card made fairly quickly. This stamp is beautiful and doesn't need much in the way of embellishment so it was ideal. Its coloured with pro-markers and the bird glazed with crystal laquer.
I do hope she recovers quickly, so get well soon Pat, we really are thinking of you.
Hugs, Gina x
Thursday, 19 January 2012
Black and White
This week at Magnolia Down Under Challenge, pretty much anything goes as long as the image is coloured in black and white. I thought this was a great challenge and here is my submission.
I've used Tilda with Daisy from this season's Sweet Crazy Love collection.
The backing papers are a mix of computer generated and Magnolia. The border is a die cut done with Memory Box Cherish Border die. These dies are wonderful to use - coated in teflon, the intricate die cuts just slide out of the dies without sticking - brilliant.
The flowers and corners are from Wild Orchid.
A bit of ribbon and card candi finish it off.
Thank you for looking.
Gina x
I've used Tilda with Daisy from this season's Sweet Crazy Love collection.
The backing papers are a mix of computer generated and Magnolia. The border is a die cut done with Memory Box Cherish Border die. These dies are wonderful to use - coated in teflon, the intricate die cuts just slide out of the dies without sticking - brilliant.
The flowers and corners are from Wild Orchid.
A bit of ribbon and card candi finish it off.
Thank you for looking.
Gina x
Friday, 30 December 2011
Happy News
Just before Christmas, my son Sam announced his engagement to Heather. They have been together since 6th form and they are now 25 and 24.
It was way too busy over Christmas to get a card made right away, but here is the finished article. I've gone for a pretty 'hearts and flowers' theme.
The image is Lili of the Valley and the flowers are from Wild Orchid. Die cuts are Marianne and Crealies and the paper is from my stash.
The insert was done on the computer and then stamped with stamps from Chocolate Baroque.
We are all out to celebrate tonight, so I'm off to do a few jobs before then.
Gina x
It was way too busy over Christmas to get a card made right away, but here is the finished article. I've gone for a pretty 'hearts and flowers' theme.
The image is Lili of the Valley and the flowers are from Wild Orchid. Die cuts are Marianne and Crealies and the paper is from my stash.
The insert was done on the computer and then stamped with stamps from Chocolate Baroque.
We are all out to celebrate tonight, so I'm off to do a few jobs before then.
Gina x
Friday, 9 December 2011
White Christmas 2
A second card for the White Christmas Challenge run by Glenda of Chocolate Baroque. This one is a simple white emboss of the trees from Fat Robin.
The backing paper is from the Season's Greetings CD ROM which is on special offer at the moment - too good to miss.
Good luck to everyone taking part in the challenge, the prize fund is now up to £32 and the more entries we make, the more chance we have of winning and the bigger the prize fund gets. The challenge closes December 15th.
Hugs, Gina x
The backing paper is from the Season's Greetings CD ROM which is on special offer at the moment - too good to miss.
Good luck to everyone taking part in the challenge, the prize fund is now up to £32 and the more entries we make, the more chance we have of winning and the bigger the prize fund gets. The challenge closes December 15th.
Hugs, Gina x
Saturday, 3 December 2011
White Christmas
Even with all of the lovely new Christmas stamps I have bought this year, I've gone back to a real favourite for my first entry for chocolate baroque's White Christmas Challenge. The house stamp is from the wonderful New England Winter themeplate, as is the dark pine tree you can see in the background.
The house and Christmas tree are a single stamp and the pine tree in the background is separate. I've done a lot of masking and overstamping to create the garden scene, with trees from Village Life, bushes from English Cottages and fence from Townhouses. These are available separately, but are a real bargain when you get them on multibuy.
The background is done using TH distress inks in tumbled glass, stormy sky and chipped sapphire, coloured over the masked stamping. It was spritzed with water for a snowy feel and then with Cosmic Shimmer in sunlight mist.
The house, trees and fence are coloured with promarkers and the roof and trees decorated with glitter. The ground is covered in pinflair's ice diamond for a wintery sparkle.
Finally, I trimmed it to size and matted and layered it onto black mirricard and another sheet of hand coloured backing paper. The 'Merry Christmas' sentiment was from one of my favourite buys this Christmas, the gorgeous Fat Robin themeplate.
The house and Christmas tree are a single stamp and the pine tree in the background is separate. I've done a lot of masking and overstamping to create the garden scene, with trees from Village Life, bushes from English Cottages and fence from Townhouses. These are available separately, but are a real bargain when you get them on multibuy.
The background is done using TH distress inks in tumbled glass, stormy sky and chipped sapphire, coloured over the masked stamping. It was spritzed with water for a snowy feel and then with Cosmic Shimmer in sunlight mist.
The house, trees and fence are coloured with promarkers and the roof and trees decorated with glitter. The ground is covered in pinflair's ice diamond for a wintery sparkle.
Finally, I trimmed it to size and matted and layered it onto black mirricard and another sheet of hand coloured backing paper. The 'Merry Christmas' sentiment was from one of my favourite buys this Christmas, the gorgeous Fat Robin themeplate.
Monday, 21 November 2011
Stained Glass Window
I've been playing with another of my Christmas stamps from Chocolate Baroque. This time its the stained glass window from the Stained Glass Christmas themeplate.
While it isn't perfect, I did get the effect that I was hoping for...
I've had to photograph this from a bit of an angle to avoid too much glare on the mirriboard and acetate surfaces.
The stained glass window was stamped using Stazon onto the acetate and allowed to dry.
I then added colour to the flames and the holly using promarkers - being very careful not to actually touch the stazon!!
The next stage was the gilding. I wanted to get different colour zones using different colours of gilding flakes. However, since I only have one pot of Lancashire Rose gilding flakes, that involved picking out individual flakes in different colours and applying them to specific areas that I had glued separately. I had gilding flakes everywhere but the effect was close to what I wanted.
I trimmed the acetate to the size of the window frame and then mounted it on black glitter card. Somehow, and I'm not sure how, I managed to get a little crack in the gilding after I had glued it to the glitter card. A little bronze glitter mat, some ribbon and some smokey mirriboard finish it off.
I like the card and I will do something similar again but definitely not until I've got hold of individual coloured gilding flakes.
Gina x
While it isn't perfect, I did get the effect that I was hoping for...
I've had to photograph this from a bit of an angle to avoid too much glare on the mirriboard and acetate surfaces.
The stained glass window was stamped using Stazon onto the acetate and allowed to dry.
I then added colour to the flames and the holly using promarkers - being very careful not to actually touch the stazon!!
The next stage was the gilding. I wanted to get different colour zones using different colours of gilding flakes. However, since I only have one pot of Lancashire Rose gilding flakes, that involved picking out individual flakes in different colours and applying them to specific areas that I had glued separately. I had gilding flakes everywhere but the effect was close to what I wanted.
I trimmed the acetate to the size of the window frame and then mounted it on black glitter card. Somehow, and I'm not sure how, I managed to get a little crack in the gilding after I had glued it to the glitter card. A little bronze glitter mat, some ribbon and some smokey mirriboard finish it off.
I like the card and I will do something similar again but definitely not until I've got hold of individual coloured gilding flakes.
Gina x
Saturday, 19 November 2011
Fat Robins
I've made quite a few cards using this little stamp. It is part of the Fat Robin themeplate from Chocolate Baroque.
The image was stamped with memento in rich cocoa and then coloured with pro-markers.
The robins are covered in glossy accents and the pie and holly glittered with holographic glitter.
I used spellbinders labels C to cut out both the coloured image and the bronze glitter card mount.
The corners were stamped with a corner stamp from New England Winter. Again available from Chocolate Baroque, and then covered in gilding flakes. A little bow finishes it off.
This one is almost the same but with the image cut out in the different orientation.
My last one to share is just a little card. The robins are decoupaged and a sentiment added and embossed.
That's all for now, see you again soon.
Gina x
The image was stamped with memento in rich cocoa and then coloured with pro-markers.
The robins are covered in glossy accents and the pie and holly glittered with holographic glitter.
I used spellbinders labels C to cut out both the coloured image and the bronze glitter card mount.
The corners were stamped with a corner stamp from New England Winter. Again available from Chocolate Baroque, and then covered in gilding flakes. A little bow finishes it off.
This one is almost the same but with the image cut out in the different orientation.
My last one to share is just a little card. The robins are decoupaged and a sentiment added and embossed.
That's all for now, see you again soon.
Gina x
Sunday, 6 November 2011
Sunrise surprise
I was blog hopping the other day, and found that my local craft shop Sunrise Crafts had donated blog candy. Hop over to Krafty - Cuts for a chance to win the Tilda with Cookies shown on the side bar. Hope I'm the lucky one though. ;-)
Hugs,
Gina
Hugs,
Gina
Look what Debbie's got
Debbie Dolphin's offering beautiful blog candy at the moment, part of which is the gorgeous 'Tilda with Snowheart' that you can see on the sidebar.
Yummy,
Gina
Yummy,
Gina
Subscribe to:
Posts (Atom)