This week's challenge at Bah! Humbug! is 'Things that fly'. Easy peasy - think angels, santa in his sleigh, birds - all easy if you have the kit or can find a digital download that does exactly what you can see in your head. Alas, that was not the case for me this week, so I am a bit embarrased by my offering...
Yes, you are right, it is indeed a recycled image from one of last year's Christmas cards.
It does meet the criteria I suppose - its got robins on, and they can fly - but it isn't exactly original.
Its just 10cm square, I've die cut the image and red mat using my nesties, added some red ribbon and layered it onto a card embossed with my swiss dots cuttlebug folder.
At least I was able to avoid buying something new, so that's one positive.
See you next week,
Gina x
This week the Less is More challenge is to use three squares and I knew right away that this would work for a congratulations card I needed to make.
I used the 5cm square stamp from the Artylicious Peacock Glory Themeplate designed by Glenda Waterworth. The image was stamped three times on white card and embossed with copper kettle EP, cut out and matted onto copper metallic card. The squares were brought together using an organza ribbon.
I am really enjoying taking part in this challenge and feel it is developing into a regular group. It is so nice to see everyone else's work and visit their blogs.
Thank you to everyone who has taken the time to visit and leave a comment, I really appreciate them.
Gina x
I have bought quite a few products from Wild Orchid Crafts recently - I love their mulberry paper flowers and they also do vintage seam binding which distresses and colours brilliantly.
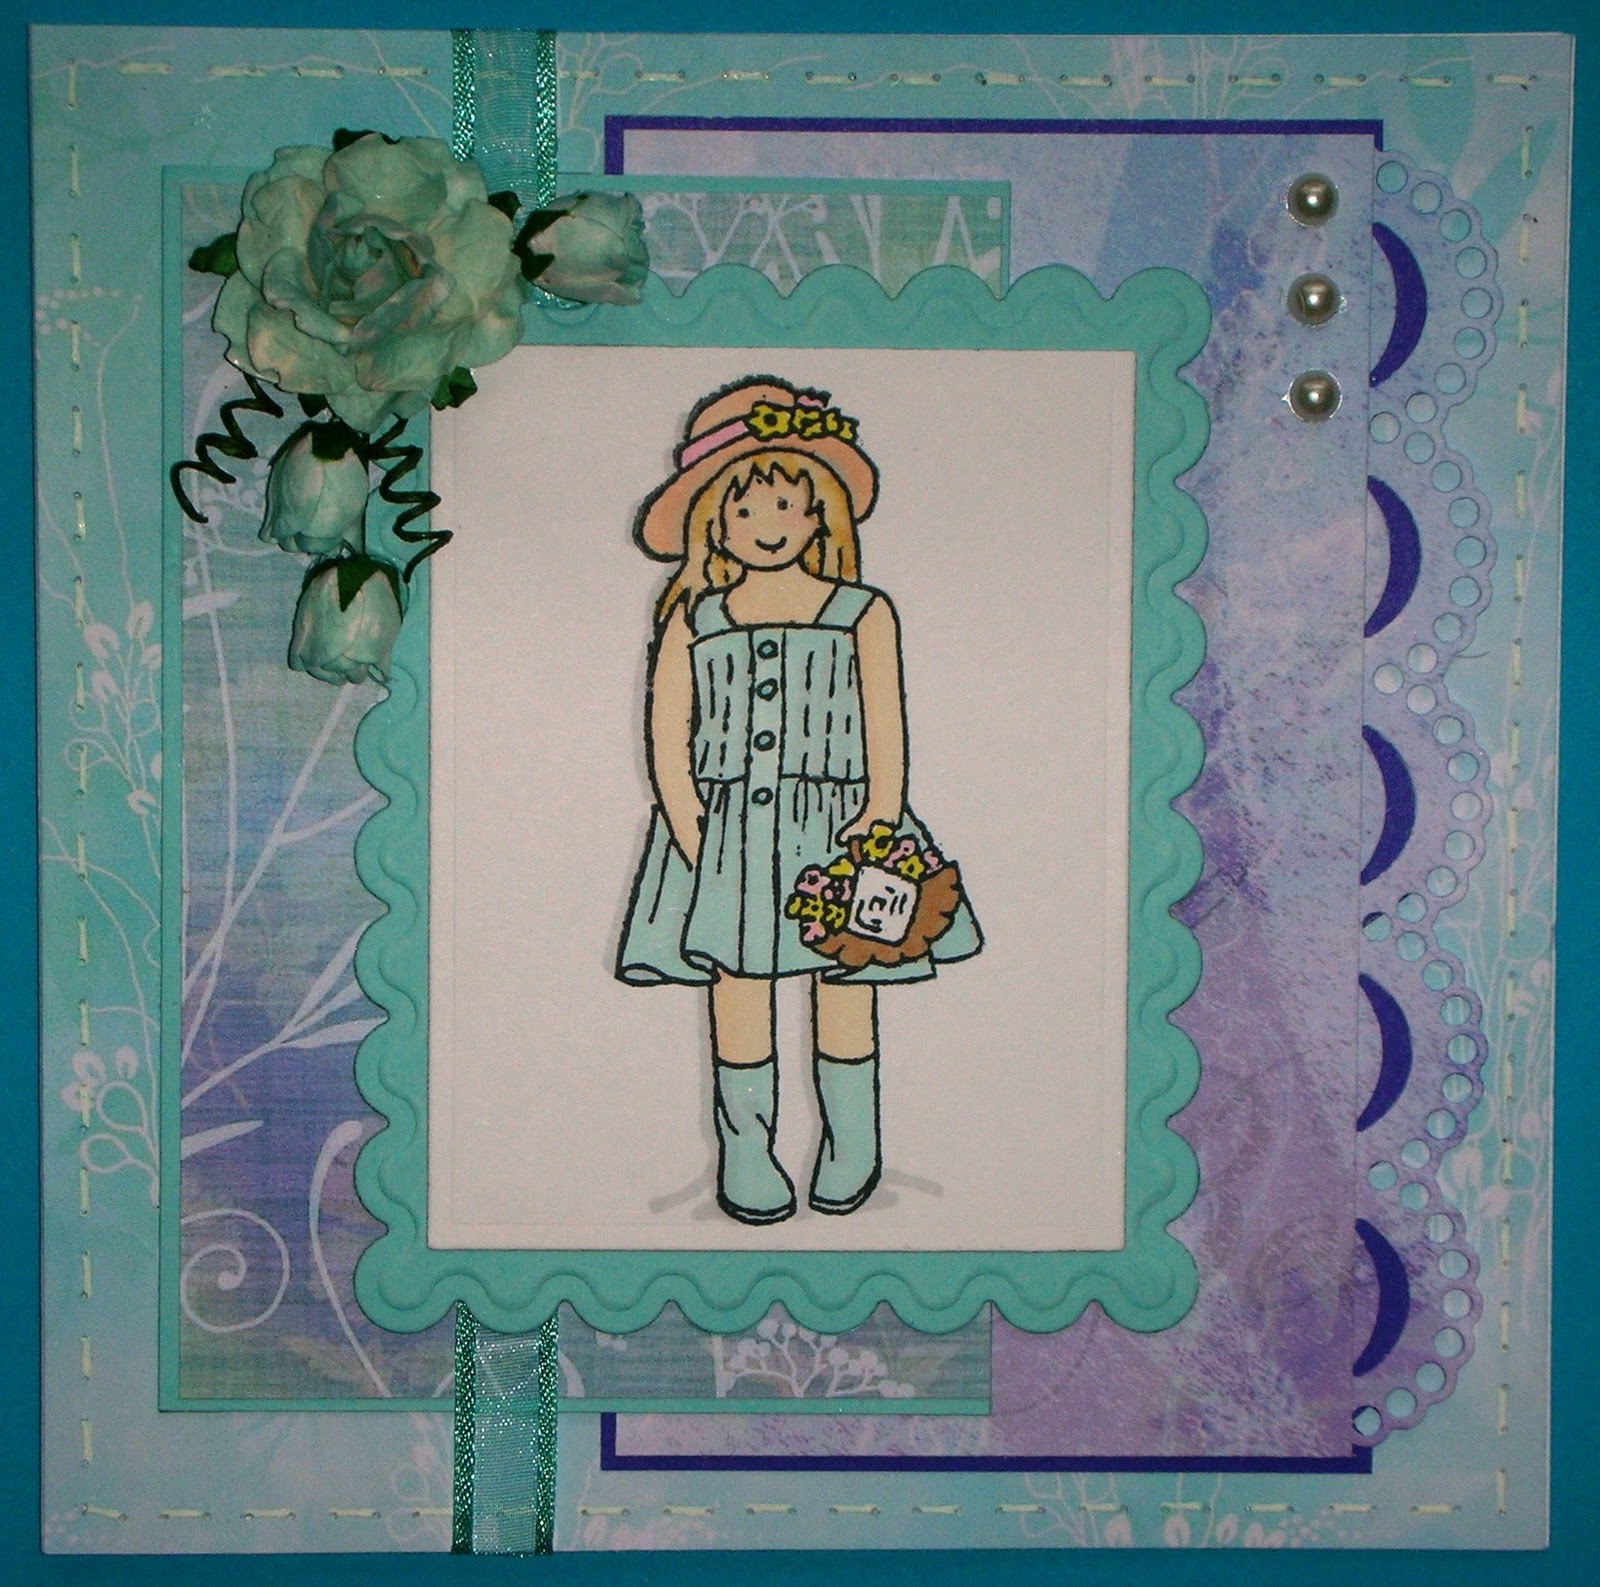
Last night I came across the Wild Orchid Challenge blog and decided to make a card following this lovely sketch by Bev Rochester.
Here is my take on the sketch.
Weirdly, I had just finished a card very similar to this but without the ribbon and with the image on a circular mat.
The design papers are all Artylicious from the Essence of Nature CD - I absolutely love this CD - it has papers for so many occasions. The plain papers are from my stash.
The image is Marianne design coloured with pro markers and the lace border is done with a Marianne creatables die.
The flowers are of course from Wild Orchid and the rosebuds are from their new range. I coloured them with a tea green pro marker.
I'm off over to the challenge blog now to post my entry.
One word of advice though, be patient waiting for the page to load since there are so many entries it takes forever on my laptop.
Gina x
This Bah! Humbug! challenge certainly got me thinking. I couldn't bring myself to alter a CD so eventually settled on making a gift box to hold a DVD.
This will really come in useful and I might well make a few more since DVDs make such good Christmas presents.
Here is my DVD gift box.
I made the box from blue lustre card and added a paper made by Craft Creations Ltd shaded with chipped sapphire distress ink.
My much loved poinsettia die by Marianne Creatables gets another outing, this time in blue and silver.
I added a small tag which, although you can't tell, is inked and stamped with a 'Merry Christmas' sentiment.
The red gems give a bit of contrast and hopefully add to the Christmas feel.
Well, that was another tough challenge ladies, I hope its a nice easy one next week.
Gina x
While I'm still racking my brains about how to incorporate a CD into a card for the Bah! Humbug! challenge this week, I thought I would share a tag I made for a tag swap.
The image is a free download from Craft Stamper which I found recently.
The original image was rectangular so I masked the oval shape on the card before printing.
Around the image, I used Spiced Marmalade, Vintage Photo and Walnut Stain Distress Inks.
For the heart at the bottom, I inked and stamped onto card and then stuck it to an acrylic tag with Crystal Lacquer.
To finish I added a few flowers, some punched leaves and ribbons.
I had started out almost framing the image with lots of flowers but felt it was overcrowded. Looking at the picture now though, I think maybe it needed a few more.
Let me know what you think,
Gina x
Time for the third challenge over at Less is More and this week the theme is Spring.
I've used this lovely magnolia digital stamp by Just Inklined. The digistamp was part of the download I got when I made a donation for Help for Katie organised by Jak Heath.
I sized the digi stamp and arranged it to fit in the bottom left corner of the card.
The sentiment is a line from a poem by A. C. Swinburne which was typed into text boxes and positioned around the image.
I printed the image and then coloured it in using promarkers. The flowers are done in pale pink, blush and ivory while the leaves are shaded using marsh green, pear green and tulip yellow.
The girls over at Jingle Belles have teamed up with Sketchy Thursdays this week giving two opportunities to win prizes.
Designs are based on this lovely sketch by Diana, founder of Sketchy Thursdays.
Here is my take on the sketch.
The snowflake paper is by Craft Creations Ltd and the stamp is from House in the Forest by Clarity Stamps.
I've stamped it in Paris Dusk memento ink and coloured it with Chipped Sapphire and Milled Lavender Distress Inks.
The white highlights are heat embossed and I've added glitter to the roof, the ground in front of the house and one of the snowflakes on the paper.
The trim is made using a Martha Stewart edge punch and ruffled ribbon.
A die cut snowflake, brad and computer generated sentiment finish it off.
Gina x
Its week two at the Less is More challenge blog. The challenge this week is to make a one layer card on the theme of trees or flowers.
I first saw this technique on Craft Stamping Quartet Blogspot and was really impressed by how effective it was.
The outer shape was made using a mask cut with a nestability and tack taped to the card before inking.
The shading is done using Distress Inks in Spiced Marmalade, Vintage Photo and Walnut Stain and an Adirondack Dye pad in Oregano.
The tree stamp is from the Elusive Images Tall Trees themeplate and is one of my favourites. The sentiment is also Elusive Images from the Sympathy themeplate.
This is a great technique for a one layer card as the distress inks blend well and are very forgiving.
Bye for now and take care,
Gina x
This week, I've made one card to fit two challenges. Over at Bah! Humbug! the challenge is to use a doily, while the specification at Jingle Belles is to avoid that perrenial seasonal colour - red.
This card is heavily dependent on the cuttlebug and I really enjoyed making it.
Mounted on cream linen cardstock, I have used Marianne Creatables dies and nesties to make the doily. The flourishes and poinsettia are also Marianne dies.
The poinsettia is inked with Vintage Photo DI and finished with an adhesive pearl in the centre.
I hope you like it,
Gina x
Less is More is the name of a new challenge blog set up by Mandi and Chrissie. I really like clean and simple cards but I don't always manage it.
This week's challenge is based on colour - make a clean and simple card using the colours pink, black and white.
My card uses a Elusive Images butterfly and sentiment.
It is coloured with pro markers in pink carnation, baby pink, pale pink and black.
I had to add just a little bit of glitter - who said that clean and simple can't have sparkle?
I embossed a single line all around to give it a bit more dimension.
I'm not sure what occasion I will use this for but I think it will be fine for almost anything.
Gina x
The challenge over at Bah! Humbug! this week is to use buttons and bows in your Christmas project.
Now, I'm OK with bows - love them in fact - but buttons are a novelty to me.
For my project this week, I was hoping to use my Spellbinders Labels A.
I bought them a few weeks ago and haven't used them yet, so I was itching to try them out.
This is another simple make but it took me quite a lot of thinking time to get the button in. If you look closely, you will find it adorning the bow.
I like the coppery colours, they make a change from the usual gold, silver and red and the copper coloured organza ribbon matches better in real life than it looks on the photo.
I can't wait to see what next week's challenge is.
Bye for now,
Gina x
Having unearthed my snowman stamp for Bah! Humbug!, I realised it was perfect for the jingle belles challenge this week to use scarf, hat, mittens etc.
I made another card using the snowman stamp but made it a bit more frosty with crystal glitter card.
I used one of my old favourites - swiss dots - to emboss the background paper to give a snowy effect.
I layered both the image and the embossed background onto silver mirriboard mats and added a strip of silver gift ribbon.
The snowflake is die cut using a Marianne Creatables die.
If I keep going at this rate, I will have more than enough cards to take all of December off.
Take care and keep warm,
Gina x
Its that time of week again.
The challenge at Bah! Humbug! this week was to use an old favourite. In this card I've used what was probably the first Christmas stamp I ever bought. By Paper Nation, it came from the craft section at the local garden centre.
Its a really simple make and I do like simple.
The image is stamped in Tuxedo Black memento ink and coloured with pro markers. Its then cut out with a nestability and placed on a silver mirriboard mat. A little bit of glitter and some gems finish it off.
Thank you for looking,
Gina x
Way back in the summer, my son's girlfriend found a baby rabbit hopping around Aston University campus. As they already have a couple of rabbits and the rescue agencies had no vacancies, we agreed to look after him until a space came up.
Needless to say, when a space became available three days later, we were so worried about where he would end up, he stayed with us.
He was the cutest little Bunneh you've ever seen.
Somehow, he injured his right eye and so off he went to the vet.
Despite treatment, his eye didn't fully recover and he was left partially sighted in one eye.
It didn't affect him and he could still judge distances for his acrobatics along the back of the sofa and jumping onto the nearby chair perfectly.
After a run around, one of his favourite places is stretched out on the sofa...
Two weeks ago, his eye flared up again and after ten days on antibiotics, he had to have his eye removed.
This was a massive operation for such a little rabbit and he was very poorly for a while.
We've got him home now and he's on the mend, but he looks pretty gruesome with half of his face shaved.
He's eating a bit more normally each day and he had a little run around tonight. It seems silly but I was really happy when he flopped down in his favourite place for the first time since his operation.
Hopefully he's well on the way to recovering. His stitches come out soon and eventually his fur will grow back and he should be OK.
I'll update you with a picture when his fur is back.
Take care.
Gina x